FRETMEISTER
How to use your Fretmeister
Using your Fretmeister
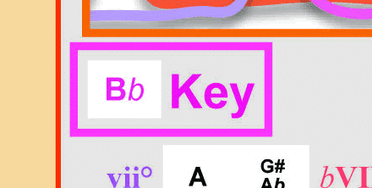
1. Key selector

If you use the tabs at either end of your Fretmeister to move the inner slide, you will see the information given in the windows change. While the notes are always in the same place (as they are on your fretboard), the coloured squares and symbols move to show the different information for different keys.
You can select the key in the pink box, by moving the slide, and all the information shown in the windows, relates to that key.
You can select the key in the pink box, by moving the slide, and all the information shown in the windows, relates to that key.
2. Chords

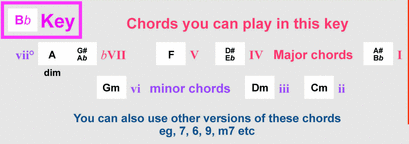
The chords given in the small windows are the ones that go with the selected key.
There are seven chords in each key, four major and three minor. Each is built on one of the seven notes of the scale. However, in practice there are actually eight chords that might sound right while playing in a particular key because often the bVII (flat VII) sounds better than the technically correct VIIº (diminished VII). Both are shown on your Fretmeister. There is more information about this in Writing Songs
There are seven chords in each key, four major and three minor. Each is built on one of the seven notes of the scale. However, in practice there are actually eight chords that might sound right while playing in a particular key because often the bVII (flat VII) sounds better than the technically correct VIIº (diminished VII). Both are shown on your Fretmeister. There is more information about this in Writing Songs
3. Individual notes
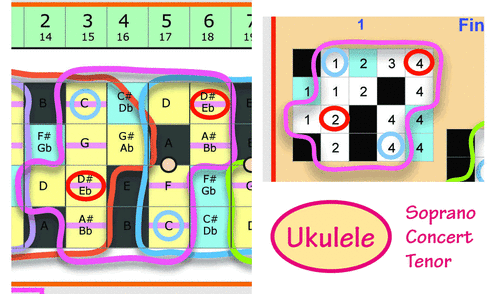
The main window, in the middle of your Fretmeister, is a representation of your fretboard. The yellow squares are all the notes you can play in the selected key. The frets are numbered in the green boxes above so the open strings are the left hand column under the '0'.
You will see that there are red ovals around some notes all over the fretboard and these notes have the same letter as the key. They are the root notes. If you start on any of these root notes and play all the yellow notes going up the same string you will play the scale. If you are playing on the yellow notes and try a black note, you will hear it sounds 'wrong'. It doesn't fit in this key.
The Major pentatonic scale (shown with a pink bar across the yellow square) is made up of 5 of the 7 notes of a major scale. These notes will always sound good together and, as there are only 5 notes in the pentatonic scale (instead of 7), it is easier to learn. If you're just starting out it is easiest to use this 5 note scale to create your solos, riffs and melodies.
Blue notes (b3 & b7) are not strictly part of the key but you will find they often sound great as part of a melody or riff as they add texture and colour.
4. Finger patterns

When I discovered the finger patterns it really opened up the fretboard for me. Learning just one of the finger patterns liberates your creativity and enables you to improvise.
There are 5 finger patterns. Each one has a different coloured shape which is shown in the main window correctly placed for the selected key. The suggested fingering is shown in the diagrams on the right of your Fretmeister.
To discover more about the finger patterns and how to use them go to Discovering the Fretboard.
©Adam Rubinstein2017
